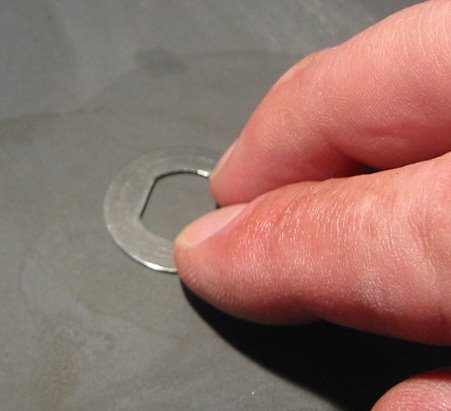
In a 1/12th scale diff, we require the balls to rotate between the thrust rings when cornering and not slip under driving torque. If you hold both wheels it should be very hard to force the spur gear around with your thumb yet the diff should feel smooth and free when the spur is held and one wheel is turned by hand (with the other moving in the opposite direction).
I use the large D ring diff that is standard on the CRC CK3.2 and CRC TFource. I am pretty sure this diff is the same basic design used on most of our cars (hmm not sure about Corally!). I tend to use the Kimbrough spurs, they use 12 balls around the outside of the spur.
Basically we want to tighten the diff lock nut just enough to keep the diff action whilst preventing the balls from slipping and compromising acceleration when the power goes down. If you over tighten, you compromise the handling of the car and wear out the differential prematurely.
I have found a few general things that increase the “grip” of the diff (resistance to slipping) while allowing the use of less thrust tension, resulting in better performance, less wear and longer life.
These notes are in two parts: In this part I present general tips for diff building. The second article will look at the add-on outer trust race from Slapmaster Tools.
General Building Tips:
1. It’s All About the Balls
Always degrease the diff balls and thrust rings with motor cleaner. Any residual oil (new parts often carry an oil film to protect against corrosion) will reduce the effectiveness of the silicone diff grease and reduce the “grip” of the diff.
I use ceramic diff balls from http://www.rc4less.com/ (see http://rc4less.safeshopper.com/22/446.htm?32 ) These last for ever and once installed and “run in” (see later), they will probably never need changing.
When your diff gets rough and feels “notchy” it is generally not the balls or thrust rings that are at fault. The most common reason for bad diff action is the failure of the outer hub bearing. I will discuss this in section 3 below.
2. Feelin’ Groovy
First I take the polish out of the surface of the thrust rings. Find a flat surface and lay down a sheet of 600 grade wet and dry abrasive paper. Work the D ring around in circles on the abrasive paper until you have a consistent finish around the orbit that the balls will travel. This is not new info here and the IRS site suggests this approach http://www.teamirsrc.com/techtips.html
The thrust D rings are pressed out during manufacture and you will find most of them are slightly concave. You will notice this when grinding them on the abrasive paper. The side you want to select to run against the balls will be the side where the grinding wear starts on the outer diameter of the ring working in rather than from the centre working out.
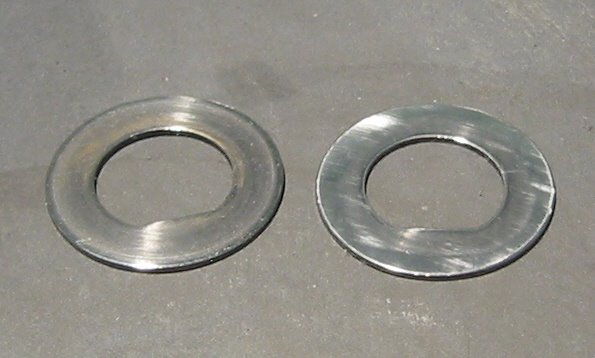
Before and after surface preparation
Ceramics

Ceramic Balls Fitted.
If like me, you go for the ceramic balls, I have found that these may not grip on the thrust rings when brand new. The ceramic balls are so hard that they can just skim over the surface of the thrust rings resulting in less diff “grip”. If you are not careful here you can make the mistake of over tightening the diff to prevent slipping and damage the outer hub bearing.
 The way I fix this is to build up the diff with a smear of “T Cut” car body restorer temporarily used in place of the silicone grease. T Cut is a light abrasive liquid suspension. Apply this to the thrust rings and the balls but do not get any in the centre ball race that locates the spur on the axle (or anywhere else other than the balls and thrust rings).
Lightly tighten the diff, just enough to get some diff action. It is going to feel a bit nasty… it’s full of T Cut! Now start to work the diff by hand for a few minutes. Force the spur gear around a few times against the action of the diff. While you do all of this, the T Cut abrasive is causing the ceramic balls to form a fine groove in the thrust rings. The surface area of the ball to ring contact patch is being ground in and increased.
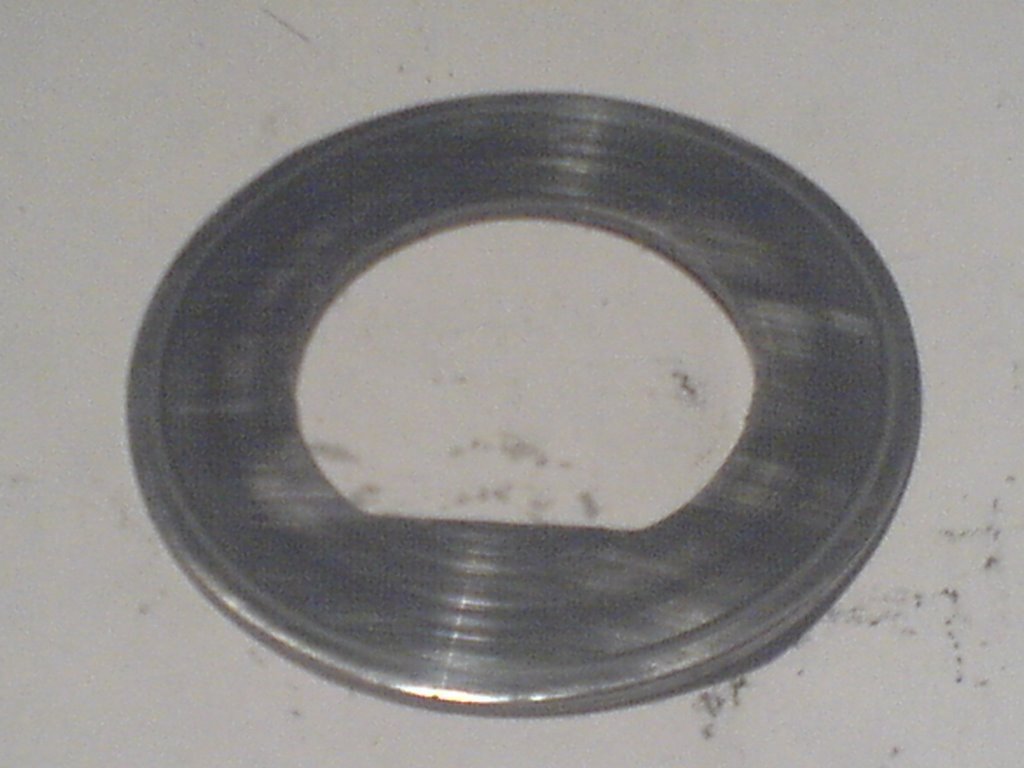
Photo above shows ground ring contact patch.
After 5 mins of working the diff by hand, strip it down and clean out all of the T Cut. You need to remove the balls and wash out every trace of T Cut . Degrease the balls, rings and spur gear with motor cleaner. Rebuild the diff with a fine smear of silicone diff grease on the thrust rings and try it again by hand. You should now be able to achieve acceptable diff “grip” with much less thrust tension.
3. The Outer Bearing is the Weak Point
Now… the standard diff balls you get in the kit tend work well from the start, the ceramic balls may need to be “ground in” (above) but once prepared, they will last you all year. Either way, when your diff gets rough it is generally not the balls or thrust rings that are at fault. The most common reason for bad diff action is the failure of the outer bearing located in the diff hub.
As we tighten the diff, the thrust load is applied to the balls and rings via the outer hub bearing. This bearing was never designed to take this kind of lateral force. This misuse is bad enough but it is made worse when you hit the boards with your rear wheels and send a shock load to the already compromised and stressed bearing.
My advice is to use a ceramic bearing on the outside of the hub, again from http://www.rc4less.com/ see http://rc4less.safeshopper.com/22/386.htm?32
I have found that my diffs build up smoother and last for longer using this bearing. Unfortunately you will still have to change the bearing out every forth meeting or so to preserve optimum diff action. If you take a big hit on the rear axle, the outer bearing can still fail at any point, even if you do use a ceramic.
I was around when Cecil Schumacher invented the ball differential (yep I’m getting on a bit ;-) This was at a time when 1/12th scale was the only electric racing class. The original Schumacher ball diff used a thrust race on the inside of the wheel and did not place any lateral loads on any bearings (hmmm to be honest I don’t think it had any bearings!).

Slapmaster Thrust Race Fitted (more later!)
Next I would like to review the Slapmaster Tools thrust race that can be added to the Associated type diffs that we all use today. This upgrade removes the lateral load on the outer hub bearing and creates a diff that will last “forever” (apperently!). More on this later, I hope to test this part at our UK worlds warm up meeting and I will report back.