Wednesday, September 06, 2006

Spektrum DSM Review: KO Vantage Upgrade

Spektrum DSM Radio System Review


Preamble… Before we start… I will tell you that I have converted my KO Esprit Vantage II (Type R) to Spektrum DSM. This is a one-way street, you cannot convert back again, so I had to be sure. Two meetings later and I am very happy…. Here is the longer version.


Well I waited and waited:

On the surface it was an irresistible proposition: No more radio interference, no chance of a frequency clash. No need to carry multiple crystals, no queuing during practice sessions, waiting for a peg. No one from the next heat can turn on and wreck the end of your run…..

But you see, I am a cynic. There had to be a catch:

Well, I saw one catch… cars turning themselves off after collisions. Spektrum themselves document the issues here

http://www.spektrumrc.com/Articles/HobbyWire.aspx

I saw it for myself in the UK with the 2005 “early adopters” and even at the 2006 12th scale Euros back in March 2006 with some cars taking a hit and needing to be turned off and on again to get going again… why would I want that?

But they fixed it. A hardware antenna problem on the transmitter module was identified and a software update followed. Then came the Pro Series with reduced latency and I judged it was time for even old gits (like me!) and late adaptors to take the floor……

I like my Sticks

Since my return to RC racing in 1999 as a more “mature racer”, I bought a KO Vantage (later upgraded to a Vantage II Type R). I need sticks! I like this thing and
I had no desire to loose a friend in the pursuit of advancement.

My path into the world of 2.4Ghz RC was therefore to convert my KO Vantage to Spectrum DSM Pro Series

The One Way Street

The KO Vantage transmitter can be converted to accept the standard DSM transmitter module. This is a conversion (in the UK) that has to be carried out by Helger Racing http://www.helgerracing.com/

The conversion involves the permanent removal of the KO crystal module and it’s internal connectors within the transmitter. You get the module PCB back but the case becomes a blanking plate. The innards are coming home in a plastic bag!


A small backplane connector is installed in the TX and a neat hole is cut into the back of the rear case to take the Spektrum DSM Module.

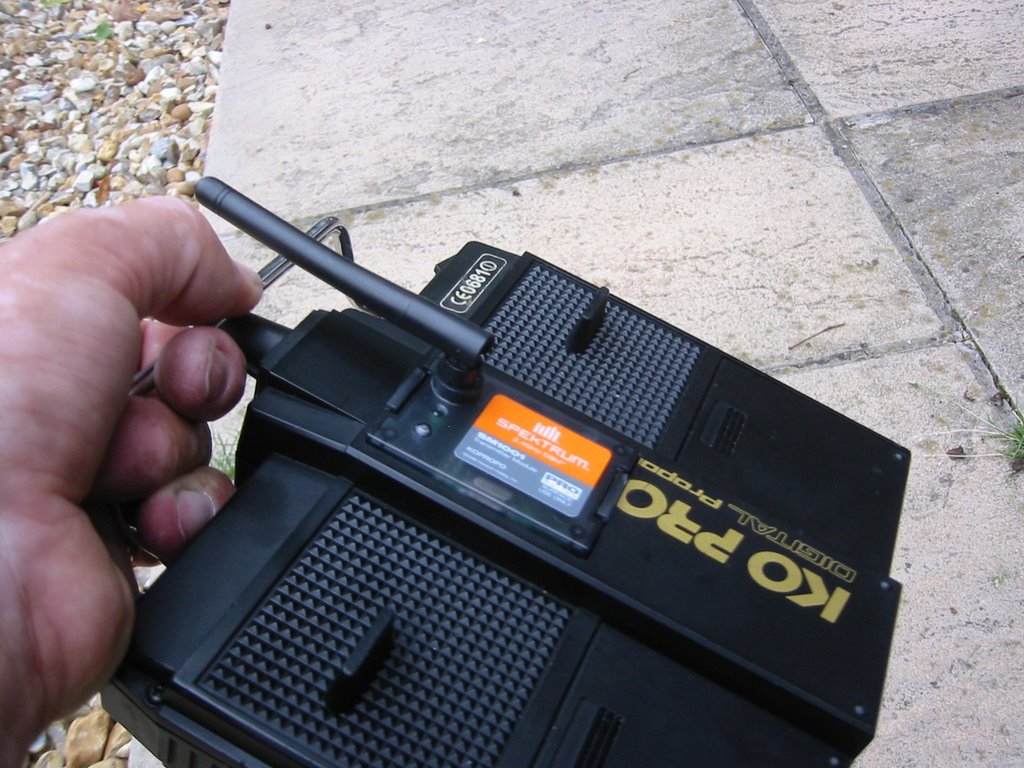
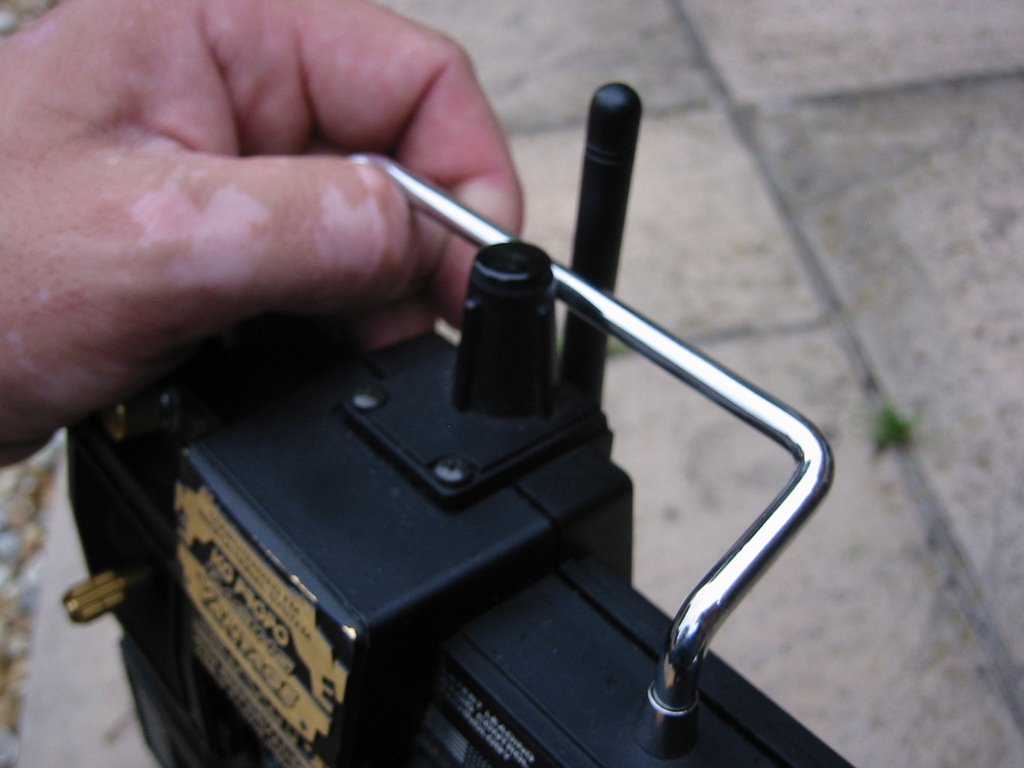
The transmitter antenna is removed and the resulting hole finished off with a neat blanking plug.


… and that’s it.

Sell all of your old KO receivers because they are now unusable with your converted tranny.

Products

I purchased the SPM1013 Pro package for KO radios consisting of the SM1001 TX Module and Pro Receiver SR3001. The cost of this package in the UK is £165. In addition to this, the cost of the conversion to the Vantage is £47.50.

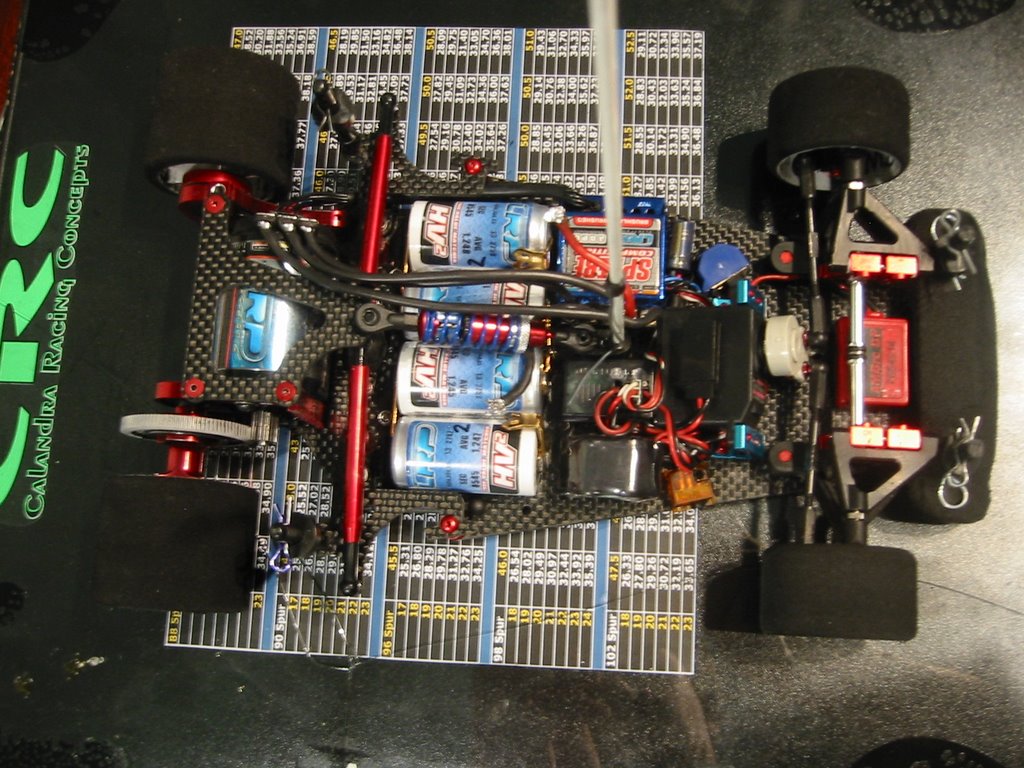
I also purchased the micro receiver (SR3500), which retails at £65. This goes into my 1/12th car (oh my gosh its small!) and the SR3001 has become the spare or for a second car.
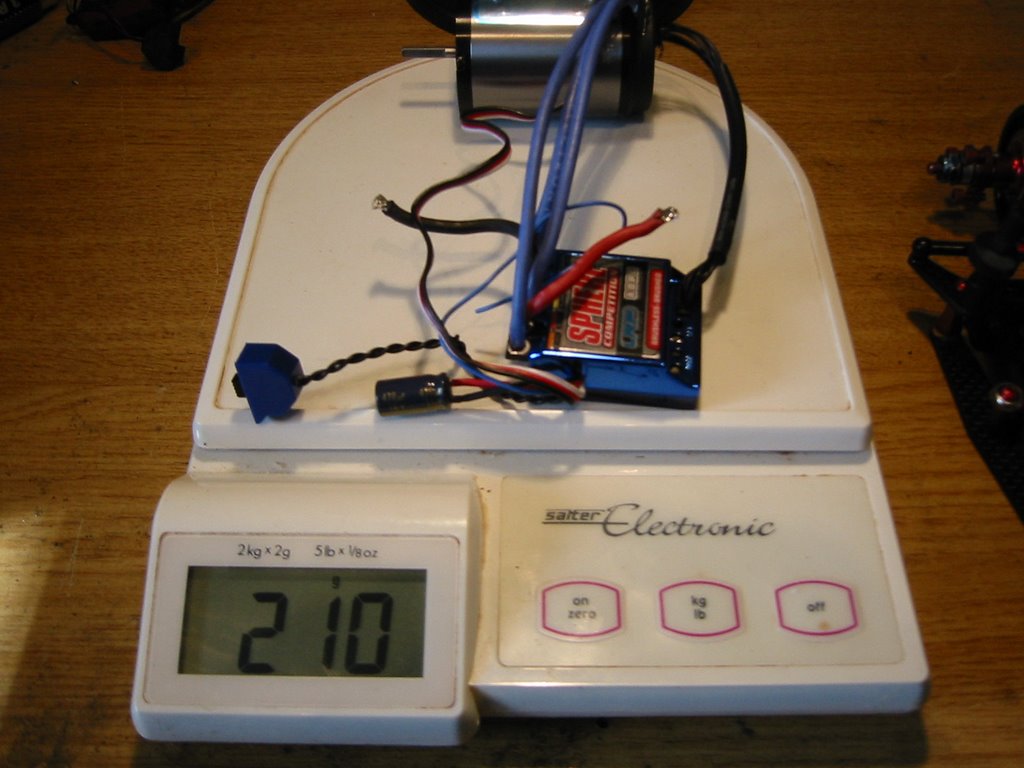
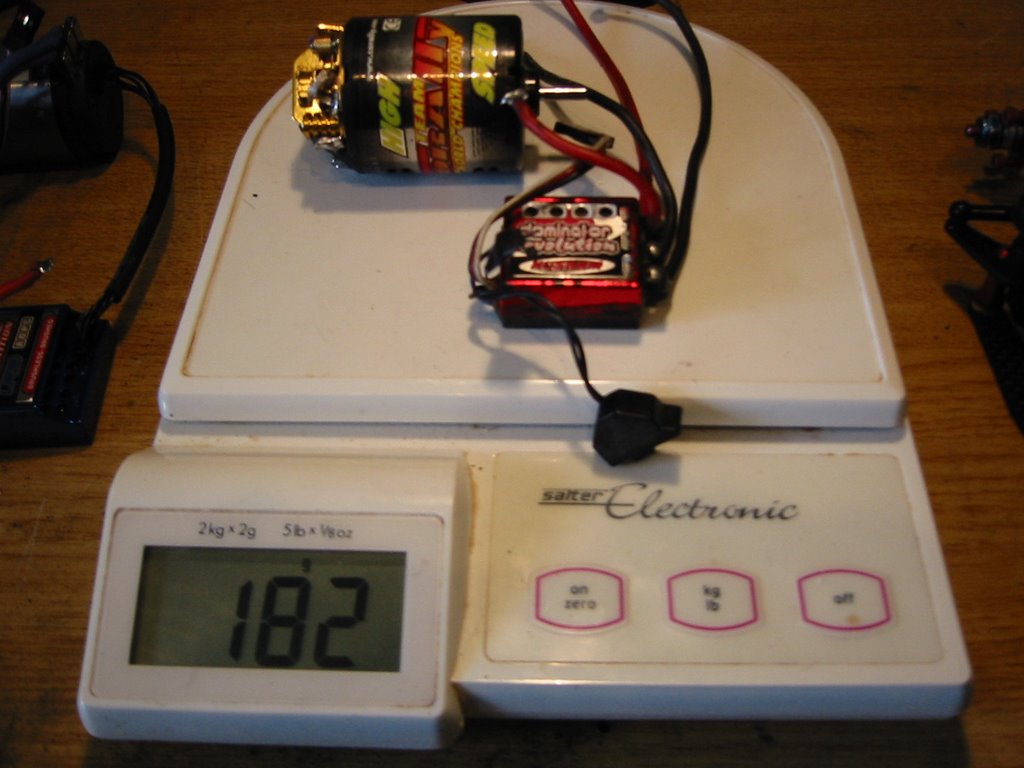
Size Matters


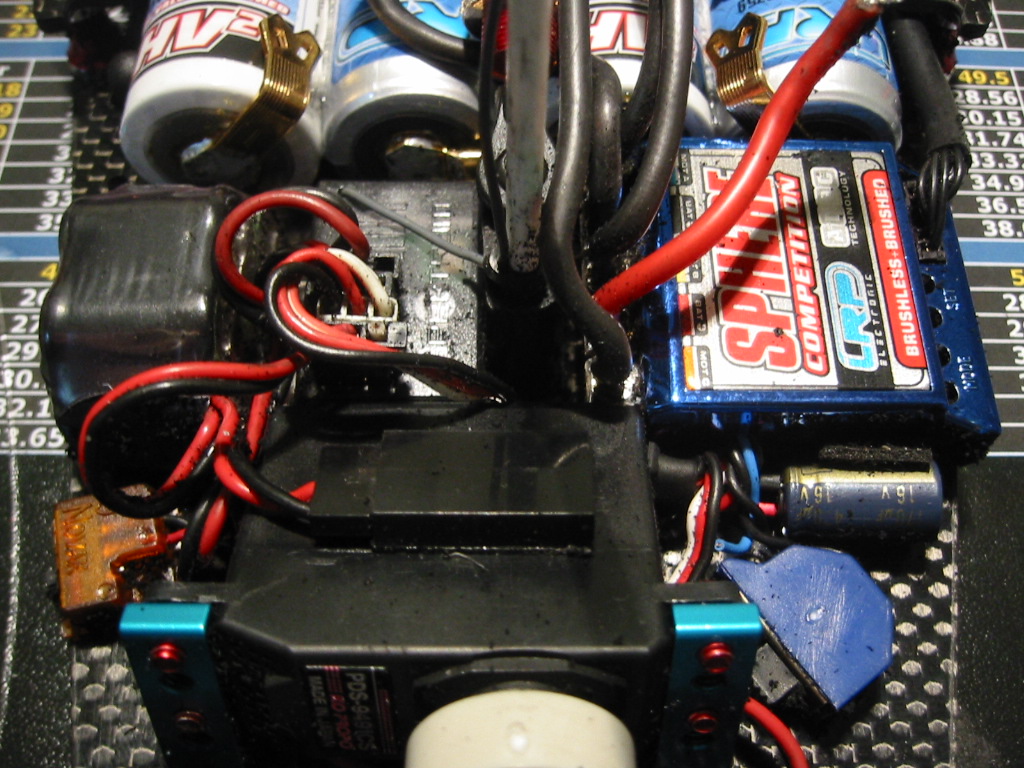
As my comparison photo shows, the Standard SR3001 RX is just a little larger than the KO-301F RX and the micro SR3500 unit is even smaller than the tiny KO-302F. Any of these RX units will fit into a 1/12th car but the SR3500 is something special!


Voltage

The Spectrum system will work right down to 3.2V so even 4 cell 1/12th racing should be no problem.

I prefer to use a 5 cell RX pack in my 1/12th for three reasons:

(1.) I like the extra servo speed

(2.)We have found the brushless system can divert power from the motor at the end of a run with the 4 cell configuration making the car feel soft when in fact there is power to spare.

(3.) We have seen personal transponder counting errors if the loop is placed in a position where 4 cell cars “power up” due to voltage dip.

My choice of running the RX pack hence has nothing to do with the Spektrum system.

In Use


I have used the system at three events now without fault.

In the light of personal transponders, the old hand out units seem obviously outdated, who would want to go back? I think the Spektrum DSM system will do the same thing for crystal radio systems.

Advantages

I don’t have to think about turning on, no one can clash with me and I cannot interfere with anyone else.

It’s fast. I cannot tell the difference. The issue of speed seems irrelevant to me.

Relax between the qualifiers and the finals… there will be no crystals to change!

Apparently it will not glitch and I have no evidence to the contrary.

The SR3500 receiver is very very small. As is its antenna wire.

Disadvantages

I don’t like the balance change to the Vantage transmitter with the antenna missing. I will be fixing it back and running the system with a “dummy” aerial up.

I think it’s a bit expensive! But I’m worth it ;-)

www.spektrumrc.com will tell you all you need to know about the system
www.helgerracing.com for the UK distributer of KO Propo and Spektrum

Monday, May 29, 2006

Preparing 12th Scale Differentials

Building Tips for 1/12th Differentials

In a 1/12th scale diff, we require the balls to rotate between the thrust rings when cornering and not slip under driving torque. If you hold both wheels it should be very hard to force the spur gear around with your thumb yet the diff should feel smooth and free when the spur is held and one wheel is turned by hand (with the other moving in the opposite direction).

I use the large D ring diff that is standard on the CRC CK3.2 and CRC TFource. I am pretty sure this diff is the same basic design used on most of our cars (hmm not sure about Corally!). I tend to use the Kimbrough spurs, they use 12 balls around the outside of the spur.

Basically we want to tighten the diff lock nut just enough to keep the diff action whilst preventing the balls from slipping and compromising acceleration when the power goes down. If you over tighten, you compromise the handling of the car and wear out the differential prematurely.

I have found a few general things that increase the “grip” of the diff (resistance to slipping) while allowing the use of less thrust tension, resulting in better performance, less wear and longer life.

These notes are in two parts: In this part I present general tips for diff building. The second article will look at the add-on outer trust race from Slapmaster Tools.

General Building Tips:

1. It’s All About the Balls

Always degrease the diff balls and thrust rings with motor cleaner. Any residual oil (new parts often carry an oil film to protect against corrosion) will reduce the effectiveness of the silicone diff grease and reduce the “grip” of the diff.

I use ceramic diff balls from http://www.rc4less.com/ (see http://rc4less.safeshopper.com/22/446.htm?32 ) These last for ever and once installed and “run in” (see later), they will probably never need changing.

When your diff gets rough and feels “notchy” it is generally not the balls or thrust rings that are at fault. The most common reason for bad diff action is the failure of the outer hub bearing. I will discuss this in section 3 below.

2. Feelin’ Groovy


First I take the polish out of the surface of the thrust rings. Find a flat surface and lay down a sheet of 600 grade wet and dry abrasive paper. Work the D ring around in circles on the abrasive paper until you have a consistent finish around the orbit that the balls will travel. This is not new info here and the IRS site suggests this approach http://www.teamirsrc.com/techtips.html

The thrust D rings are pressed out during manufacture and you will find most of them are slightly concave. You will notice this when grinding them on the abrasive paper. The side you want to select to run against the balls will be the side where the grinding wear starts on the outer diameter of the ring working in rather than from the centre working out.


Before and after surface preparation

Ceramics


Ceramic Balls Fitted.

If like me, you go for the ceramic balls, I have found that these may not grip on the thrust rings when brand new. The ceramic balls are so hard that they can just skim over the surface of the thrust rings resulting in less diff “grip”. If you are not careful here you can make the mistake of over tightening the diff to prevent slipping and damage the outer hub bearing.


The way I fix this is to build up the diff with a smear of “T Cut” car body restorer temporarily used in place of the silicone grease. T Cut is a light abrasive liquid suspension. Apply this to the thrust rings and the balls but do not get any in the centre ball race that locates the spur on the axle (or anywhere else other than the balls and thrust rings).


Lightly tighten the diff, just enough to get some diff action. It is going to feel a bit nasty… it’s full of T Cut! Now start to work the diff by hand for a few minutes. Force the spur gear around a few times against the action of the diff. While you do all of this, the T Cut abrasive is causing the ceramic balls to form a fine groove in the thrust rings. The surface area of the ball to ring contact patch is being ground in and increased.


Photo above shows ground ring contact patch.

After 5 mins of working the diff by hand, strip it down and clean out all of the T Cut. You need to remove the balls and wash out every trace of T Cut . Degrease the balls, rings and spur gear with motor cleaner. Rebuild the diff with a fine smear of silicone diff grease on the thrust rings and try it again by hand. You should now be able to achieve acceptable diff “grip” with much less thrust tension.

3. The Outer Bearing is the Weak Point

Now… the standard diff balls you get in the kit tend work well from the start, the ceramic balls may need to be “ground in” (above) but once prepared, they will last you all year. Either way, when your diff gets rough it is generally not the balls or thrust rings that are at fault. The most common reason for bad diff action is the failure of the outer bearing located in the diff hub.

As we tighten the diff, the thrust load is applied to the balls and rings via the outer hub bearing. This bearing was never designed to take this kind of lateral force. This misuse is bad enough but it is made worse when you hit the boards with your rear wheels and send a shock load to the already compromised and stressed bearing.

My advice is to use a ceramic bearing on the outside of the hub, again from http://www.rc4less.com/ see http://rc4less.safeshopper.com/22/386.htm?32

I have found that my diffs build up smoother and last for longer using this bearing. Unfortunately you will still have to change the bearing out every forth meeting or so to preserve optimum diff action. If you take a big hit on the rear axle, the outer bearing can still fail at any point, even if you do use a ceramic.

I was around when Cecil Schumacher invented the ball differential (yep I’m getting on a bit ;-) This was at a time when 1/12th scale was the only electric racing class. The original Schumacher ball diff used a thrust race on the inside of the wheel and did not place any lateral loads on any bearings (hmmm to be honest I don’t think it had any bearings!).


Slapmaster Thrust Race Fitted (more later!)

Next I would like to review the Slapmaster Tools thrust race that can be added to the Associated type diffs that we all use today. This upgrade removes the lateral load on the outer hub bearing and creates a diff that will last “forever” (apperently!). More on this later, I hope to test this part at our UK worlds warm up meeting and I will report back.

Sunday, March 12, 2006

Going Brushless; Report from 1/12th Scale 2006 European Champs


Going Brushless: Report from 1/12th Scale 2006 Euros

During the 2006 European 1/12th Scale Championships in Gran Caneria, I had the chance to test out the new LRP Sphere Competition Brushless ESC in combination with the LRP 4 Star Vector Brushless Motor.


For more information on the 2006 1/12th Euros see http://www.ec2006.org/
For background spec and technical info on the LRP Sphere/Vector Brushless system see http://www.lrp-electronic.de

Currently in the UK 2005/2006 season, BRCA sanctioned events for 1/12th scale do not allow the use of Brushless systems. As a result of this not many UK 1/12th racers have gained any significant brushless experience so the Euros were going to be a watershed.

The Base Modified setup

I arrived for the Friday practice sessions with my standard setup for modified loaded into the car. I use a KO VFS Competition ESC with various motor options. My most used motor has to be the Corally Black Series 10*2. This motor seems to have the best run time for me when timed around 11 degrees and pulling 40mm/rev.


As you can see, the brusless setup is 28 grams heavier than my modified brushed setup.

Drive Smooth

By nature I am a smooth driver. I tend to not throttle jam and being a bit of an “old man” I like to allow the car to roll around for the first 2 mins at least. I will use the sweeper at the end of the straight to save energy and try not to feel the end of the sick too much until the last 4 mins.

End of Season Cells

We all know that cells loose capacity as they age with charge/discharge cycles. I must admit that I aimed to compete with “end of season” GP3700 cells. These cells have lasted me the whole UK BRCA national series running both 19T and modified events.

I do keep an eye on things and I know that from testing all my packs prior to the event , they charge to around 4200 mAh (4.5A charge 0.04 pack delta on a ProTrak charger). Discharge capacity for the 20A cycle on the Protrack is in the order of 3600 mAh (0.9V per cell cutoff). Hence these cells are not the best but they are not garbage either.

Run Time Issues

As the grip came up during Friday practice and by the 4th round with my brushed setup I started to dump! It became obvious to me that run time was going to become a major stress for me.

After the first grading round I was 21st overall (this was not going to last! I am one of those drivers cursed with the ability to drive a new track reasonably quickly but then not improve!)

The Euros track was as large as we see on the UK scene with the top pace being around 37 laps.

I realised that my duration situation was just going to get worse…….

LRP to the Rescue!


I had already arranged the possibility of testing the LRP Sphere/Vector system in association with Helgar Racing (the UK distributor of LRP) and LRP. The LRP Company had Reto Konig (R&D Manager at LRP) in attendance giving technical support to drivers at the meeting.

Reto hooked me up with the Sphere Competition ESC and the 4 Star version of the Vector brushless motor. I only had the time between adjacent timed practice rounds to fit the combo to my CRC Carpet Knife!

Fitting the System

Reto had already fitted a thinner 16 AWG wire loom more suited to 4 cell 1/12th scale cars. None of us would want to run the 13 AWG wire that the system is supplied with (suitable for TC racing), there would be too many tweak issues to the Motor pod on a 1/12th scale car.

The ESC also had a small 470uF 16V power capacitor pre fitted to small power wires coming from the side of the unit.

My first fitting attempt was a failure (!) mainly down to me rushing to get the car turned around for the next qualifying session. Less haste and more speed was required.

In the end I settled for the layout you see in the pictures with the sense wire running under the tweak brace and the three motor power cables following the centre line of the car.


LRP make the sense wire in two lengths (Part no 81920 is 100mm and 81910 is 200mm). I had the shorter 100mm harness which is just right but only just long enough, you have to fit the ESC as I have shown or the short sense wire will not reach.

I made sure the motor wires did not obstruct the damper tubes, restrict rear pod movement or catch on the underside of the body in any way.

The LRP Sphere Competition controller is the lowest profile brushless unit available and does not need a fan or heatsink for 4 cell 1/12th cars. This is good news as it just fits under the Parma Zytek shell that I tend to use. This shell is one of the lowest shells at the sides so if this works for me it will work for any body I think.

I just managed to turn the electrics refit around in time. The rest of my tyre and car prep was a bit of a disaster due to time pressure but I managed to do it all in the one hour available. To be honest, people have said that fitting brushless to a 1/12h car is a stress, I did not find this to be true. Give me two hours not under meeting pressure and I would have a neat job done and time for a cup of tea and a sandwich.

The Basic Settings

The Sphere programming user interface is similar to the Quantum QC3 and Nosram clones so it was familiar to me even without the manual.

Reto had preconfigured the speedo with the following settings which I did not change.

Mode 1: Auto Cell System Setting 2 = NiMH 4-7 Cell racing mode
Mode 2: ADPC Power Profile Setting 3 from 6 Levels increasing punch
Mode 3: Initial Brake Setting 2 from 6 Levels increasing initial brake
Mode 4: Automatic Break Setting 2 from 7 (0-6) Levels increasing drag break

I don’t use breaks in 1/12th scale so the Mode 3 setting was irrelevant to me. This is not true of the Mode 4 setting. Brushless motors do not magnetically “cog” so it is important to simulate the natural breaking of a modified motor to create the same weight transfer and slowing as you lift off the throttle. LRP (Reto) advised me that the Auto Brake setting of 2 would be like a “standard” modified motor so I went with that.

Gearing

I was advised to start at 30mm/rev (wow.. that’s low!) so I did exactly that. I had to buy a few new pinions and ended up on around 21/96 on 45mm dia tyres. Remember that this is the 4 Star motor here.

In Use

I took it easy for the first two laps…. Then started to push….. oh its fast! Feels like my 10*2 … more top end speed with a really smooth power delivery. The auto break felt no different to my brushed motor and I was straight onto my previous lap times.

So… after 4 laps I decided to “drive it like I stole it” just to see what would happen. I nailed the thing for the remaining 7 mins. It was not pretty and I am not proud of myself ;-) but I had a lot of fun.

The car just ran and ran to the end. I lifted it off the track and the motor was warm but not hot to touch. The post race discharge (now there is a novelty) showed me coming back with 300mAh left in the tank. Oh Joy.

Now…. through Saturday (qualifying) and Sunday (finals) I did not touch the motor or even think about it. I did not dump once and in fact, I won the first leg of my final (from 5th) in the last lap as the leader dumped in front of me ;-) I had legs to the end.

After 3 legs I was 3rd overall in the D final. Not bad seeing Marc Rheinard had come out to play with the CRC trinity and the 12 disciples thrown in for good measure.

In hindsight maybe increasing the Mode 2 power profile from 3 to 4 may have been interesting .. oh well, next time.

Conclusion

To my mind the LRP Sphere/Vector Brushless system is a total winner. I spent an enjoyable two days of competitive racing at the Euros without the anxiety of dumping and I did zero motor maintenance.

I was left in peace to think about racing lines, car setup and tyre choice.

It is true that the top three cars in the A final (Team CRC!) were running brushed motors and maybe it can be argued that with brand new top class cells and Oscar Jansen sat at your pit table brushed is very fast indeed. I am mature enough to realise that my failure to make B and A finals at this level has nothing to do with horsepower. I am simply not good enough, and this may never change. I just want to keep on learning and enjoying my racing. The Sphere/Vector combo just added to my enjoyment of the whole weekend.

I really hope we pass Brushless for the 2006/2007 BRCA season. I know how I will be voting.

In preparation for the last UK modified national at Chesterfield I have taken the LRP system out again and it is sitting in front of me without a car. Oh well. Better charge the comm lathe pack again……

Many thanks and regards to

Helgar Racing http://www.helgerracing.com/
LRP Electronic http://www.lrp-electronic.de/
Reto Konig
David Splashett